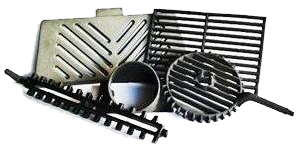
When you first received your new woodstove, you likely burned several small break-in fires to properly condition it. The same care will be necessary when installing your replacement parts, particularly cast iron ones. Below are the detailed steps for curing your new cast iron parts.
Preparation Steps:
1. Dry Fit: Before beginning the curing process, ensure that you dry-fit the replacement parts in your stove. This allows you to check the fit and make necessary adjustments, such as drilling holes or grinding down edges. Please do this before curing because the parts will become more challenging to modify once fully cured.
2. Adjustments: Over time, the stove may have shifted or warped slightly, so you might need to drill holes for proper alignment or grind parts to ensure a good fit. This is much easier to do before the parts fully harden through curing.
Curing Methods:
Depending on their size and convenience, you can choose between two primary methods for curing your new cast iron parts.
1. Break-In Fires (In-Stove Curing):
For larger parts or those already installed in the stove, follow the same break-in process you used when the stove was new. Here's how:
- First Fire: Light a small fire in the stove and gradually raise the surface temperature to about 200°F. Let the stove cool completely to the touch.
- Second Fire: Build another fire, raising the temperature to about 300°F. Again, let the stove cool down fully.
- Third Fire: Light a third fire and bring the temperature to around 400°F. After this, allow the stove to cool completely once more. Once the part has undergone these steps, your stove will be ready for regular use.
2. Oven Curing (For Smaller Parts):
It may be more convenient to cure smaller cast iron parts in your oven. Follow these steps:
- Preheat your oven to 325°F.
- Heat the part(s) in the oven for 30 minutes.
- After 30 minutes, increase the oven temperature by 25°F.
- Continue raising the temperature by 25°F every 30 minutes until you reach 500°F.
- Once the temperature reaches 500°F, allow the parts to cool to room temperature inside the oven before removing them.
- Once cooled, the parts are ready to be installed in the wood stove.
Important Notes:
- Cast Iron vs. Steel: This curing process is essential for cast iron parts to ensure they harden properly and last longer. However, if you are replacing steel parts, they do not require any curing process.
Following these steps will ensure that your replacement parts are properly cured and ready for long-term use in your wood stove.


/1003/site-assets/logo.png)


