Contact local Building or Fire officials about restrictions and installation inspections in your area.
WARNING: A MAJOR·CAUSE OF CHIMNEY-RELATED FIRES IS FAILURE TO MAINTAIN REQUIRED CLEARANCES (AIR SPACE) TO COMBUSTIBLE MATERIALS. IT IS OF UTMOST. IMPORTANCE THAT THIS CHIMNEY CONNECTOR BE INSTALLED ONLY BY THESE INSTRUCTIONS.
Caution: No insulation can be used/placed in the (air space)
GENERAL:
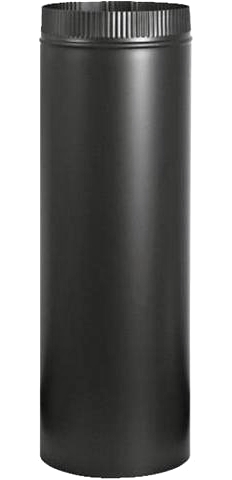
The Single Wall Black Pipe (600 series) has been designed as the connector between the stove and a chimney system. The SW pipe has been designed with a slip-in fit and secured with sheet metal screws.
SAFETY:
The SW pipe (600 series) requires 18-inch clearance to combustible material. The SW pipe is not designed to be enclosed or penetrate combustible floors, ceilings, or roofs. There are many different appliance flu collars. A stove top adapter may be required to fit into the appliance flue collar if the pipe does not fit inside. Wood fuels create creosote during low firing, which can be dangerous if allowed to accumulate in any portion of the SW connector or chimney system. The SW and chimney system should be periodically inspected for creosote and cleaned if necessary.
Horizontal runs must maintain a 1/8" per foot rise to ensure draft, and should be kept to a minimum. On longer runs, use 45° elbows as an offset run to avoid long horizontal runs.
INSTALLATION:
1. Determine the appliance outlet location relative to the chimney system ceiling support or existing masonry chimney. If the appliance is being terminated into an existing masonry chimney, a trim collar (605) is used to close the gap between the brick and SW connector.
2. If your installation is using a slip connector, the connector is attached to the ceiling support flue and secured with 3 sheet metal screws.
3. Install the stove top adapter on the appliance collar with the crimp end into the appliance collar (if needed). Secure with 3 sheet metal screws.
4. If more than two sections are used in your installation, install SW sections starting at the single wall adapter until only two sections are left to be installed. Install one SW section over the single wall slip connector and adjust upward. Install the final SW section. Slide the uppermost SW section downward to complete the connection. Secure each joint with 3 sheet metal screws.
5. Only one pipe section is recommended between elbows if elbows are required. The elbows are secured to the pipe section with 3 sheet metal screws.
Note: The 90-degree SW elbow is usually used to vent a top-opening stove into an existing masonry chimney.
6. For rear outlet stoves, a single (SW) tee directs the exhaust upward. A single wall adapter is required between the stove outlet and the Tee.
7. For average room heights, telescoping sections can be used between the stove outlet and the ceiling support. Slide the top section into the bottom section; adjust the pipe section a couple of inches smaller than the measured gap filled. Place the bottom section into the stove adapter (if needed). Extend the telescoping pipe top section into the mating pipe section and secure it with 3 sheet metal screws.
8. If the stove outlet's diameter is smaller than the ceiling support's, a single wall increaser (612) can be used. The increaser is normally secured to the ceiling support.
9. Upon installing the stovepipe, it is understood that blemishes or scratches can result that will require a touch-up application of black paint. We recommend Satin Black High-Heat spray paint. If applied per the manufacturer's instructions, this can be very effective. Do not spray too close to the target surface—running, bubbling, or droplets can occur.


/1003/site-assets/logo.png)


