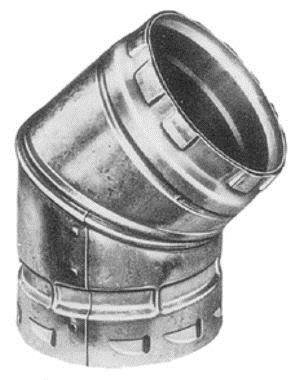
Stoves come in more than one chimney design, but not all are interchangeable. One such design is reserved for gas stoves. The B Vent, or natural vent, chimney offers some benefits worth keeping in mind, and this article explains them all. You will also learn how to replace, clean, and maintain your B Vent for an A+ experience.
How does a B Vent Chimney Differ from Other Chimney Options
If you are new to vent systems, a B vent is the simplest design. It uses heat from fires to vent like a traditional fireplace, pulling in air from the room and then exhausting the air through a vertical pipe.
Benefits of a B Vent Chimney
Here are some top reasons B Vent chimneys may be right for you:
The Look - The biggest benefit is the look. B vent systems allow for open fireplaces that provide more visual warmth and ambiance, as well as a good-sized flame.
The Cost - The vents are inexpensive to purchase compared to other vent pipes.
The Ease of Use: These types are easy to install.
Why is It Called a B Vent?
The “B” isn’t related to its shape or function; it relates to the class of vent. Each class is represented by a letter of the alphabet (A Vent, L Vent, etc.).
What Types of Units Use a B Vent Chimney?
B vents are only allowed on gas stoves and fireplaces due to the fact the piping melts at a lower temperature than wood and pellet stoves operate.
A good example is the line of B-Vents from Amerivent.
Issues to Be Aware of With a B Vent Chimney
- Due to low burn resiliency, B Vents are used on gas stoves only.
- Since all B-Vents are vertical, they also require special care to prevent water from entering the home. A solution for this is covered in the installation section below.
- There are some unique code requirements for this type of vent, although other vents will also have similar or alternate code requirements.
How to Install and Replace a B Vent Chimney
There are many types of parts for B Vents, including the pipes and fittings, a rain cap, adapters, and other support systems. The range of products you need will depend on what you need for your stove.
Pipe assembly
All piping has basic instructions for assembly and most often has a male and female end to each pipe. During installation, the male end faces the top, and the female is on the bottom. Typically piping will indicate this with an up arrow, showing you which direction should be on top. The male end is typically smaller in size and feeds into the female end.
Pipe connections can either be twisted together, crimped together, or attached with self-tapping screws through designated holes.
Roof Assembly
For the roof, you will need to ensure maximum water protection. One method is to install two layers of base flashings – a pipe with a flat, wide, sheet along the bottom. This process requires removing shingles from the area around the piping.
- Lay down the base flashing, and nail it into place onto your roof.
- Cover with ice and water protection with adhesive backing
- Reinstall a first layer of shingles
- Install a second base flashing over the first, nailing down the flashing like you did the first one.
- Cap the base flashing with a final layer of roof shingles.
How to Clean a B Vent Chimney
The good news is gas firplaces don’t produce ash or creosote, but they still require cleaning. Every few weeks check the interior of your piping with a mirror and flashlight to spot issues like obstructions due to nests, birds, and other critters. Once spotted, be sure to clean them out. Also, fix any cracks or holes in the piping to you maintain maximum draw.
How to Maintain a B Vent Chimney
The good news about gas fireplace pipes is they are easier to maintain than wood or pellet pipes. Still, strong ventilation is integral for an efficient and safe gas stove or fireplace.
B Vents: The Vent to Consider for Your Gas Stove
B Vents are good-looking, affordable, and easy to install, and with regular cleaning, you can ensure your B vent has a long life, maximizing your dollar.


/1003/site-assets/logo.png)


