


An integral part of any fireplace, stove, or home heating unit is a thermocouple. Like any part of your wood or pellet stove, it will eventually need replacing. But how do you do it, and why is this device so important?
This article helps you better understand what a thermocouple is, why you need one, and how to replace it yourself.
What is a Thermocouple?
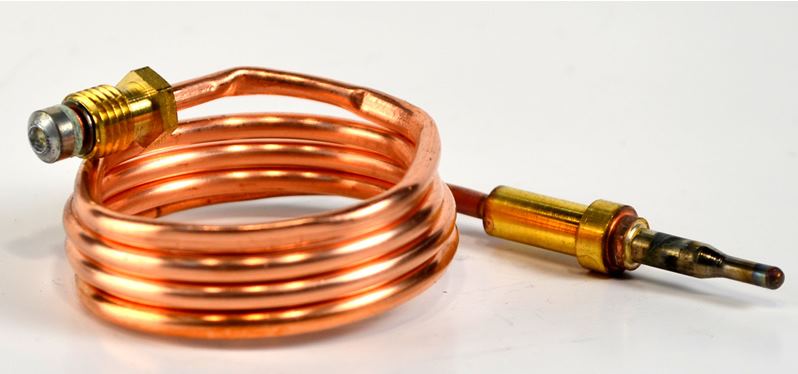
A thermocouple senses the temperature at your pilot. It consists of two wires of different metals joined together at one end (called the hot junction) and connected to a thermal block on the other end (called the cold junction.)
When heat interacts with the hot junction, each wire has a different heat resistance, and the difference is measured in voltage. This voltage indicates to your control board when to increase, decrease, or maintain your stove's heat.
In gas stoves, the same device operates the gas valve.
Thermocouples are extremely common. You will see them in most stoves models, including:
- Wood stoves by Jøtul, Vermont Castings, Hearthstone, and Morso
- Gas stoves by Jøtul, Mendota, Fireplace Xtrordinair, Vermont Castings, Kozy Heat
- Pellet stoves by Quadra-Fire, Enviro, and Englander
Is a Thermocouple the Same as a Thermopile?
A thermopile is multiple thermocouples, typically five or more, joined together, allowing for higher temperature readings. To learn more about it, see our link on What is a Thermopile. Some fireplaces have both a thermocouple and a thermopile, while others only use one. They are easy to spot. A thermopile is bigger and cylindrical at one end, while a thermocouple is shorter and thinner with a pointed end.
How to Clean and Maintain Your Thermocouple
While doing your typical cleaning and maintenance of your stove, you should clean the ceramic cover on the hot junction end of the thermocouple. To do that, remove the cover, do any surrounding stove cleaning, and then wipe and replace the ceramic cover.
How to Know if Your Thermocouple is Not Working
You can test the thermocouple with a voltmeter that is set to DC volts. You should see a reading on your meter anywhere between 8 and 30 mV. The higher the reading, the better your thermocouple is. If it is less than 8, you should replace it. If the readings are too low, or if you see that the wire connections on the hot junction side are broken, you should replace the thermocouple.
How to Replace Your Thermocouple
You should get about ten years from your thermocouple, but the time will come when it needs replacing. Be sure to replace it with the same thermocouple model that comes with your stove.
Here is a general replacement guide. Be sure to check your owner's manual for more information.
In the case of a pellet or wood stove,
- Unplug it from the wall.
- Lift out the thermocouple wire from the control board. It may be located inside the back or the side of the stove.
- Open the front glass door and look for the end of the thermocouple inside the firebox. It may be on the firebox's top left or right side.
- Locate the same end section within the stove frame from behind, and proceed with removing it from that side.
- You may need to replace a stainless steel guard holding the thermocouple. Unscrew the connection and pull the thermocouple until you feel resistance, and don't pull too hard. Once you feel resistance, move the wire down 90 degrees and try it again, and then repeat this same step by moving the wires another 90 degrees. It should then be loose enough to pull out.
- Once the thermocouple is removed, repeat the process in reverse.
In the case of a gas stove,
- Unplug it from the wall.
- Turn off the gas supply.
- Note the distance of the thermocouple from the pilot light since you will need to repeat that same distance later.
- Unscrew the connection holding the thermocouple to the gas valve.
- Unhook the probe from the clip and take out the thermocouple assembly.
- Replace it with a new thermocouple that corresponds to your make and model of the stove.
- Follow the steps in reverse, ensuring the tip of the thermocouple sits at the same distance from the flame. Do all final tightening with a wrench.
- Test the thermocouple by lighting the pilot. It should stay lit without you having to press down on the button continuously. You may need to adjust the distance again to the pilot light to ensure the pilot stays lit.
Your Thermocouple: A Small Device with a Big Role
Maintaining and replacing your thermocouple is vital for maintaining accurate temperature readings and boosting the efficiency of your stove. Thankfully, following the above steps is pretty easy, especially after you do it once. You can do all the steps yourself at home, and it doesn't take long.